
Converting Picture to Drawing with Watercolor and Ink Splatter Background in Photoshop
In this Photoshop tutorial, we will converting picture to drawing, add some watercolour and ink stains to produce a creative piece, and add a paper texture to the background for a more natural look.
Firstly, download the free images used in this tutorial. You can also see a video Converting Picture to Drawing in Photoshop. and visit this related tutorial 15 Free Photoshop Watercolor Brushes to turn your images into a creative watercolour.


Preparing the Picture that we wil converting to drawing
Start by enlarging the canvas of the model image to frame it using the Crop tool. Making sure we have Content-Aware selected before confirming the crop. This means the enlarged areas made by the crop are filled in with the same background that we had.
Select with the Lasso some details that we want to eliminate and fill them using Edit> Fill and making sure Content-Aware has been selected.
Unlock the layer by clicking on the padlock, right-click and select Convert to Smart Object and name it as ORIGINAL.
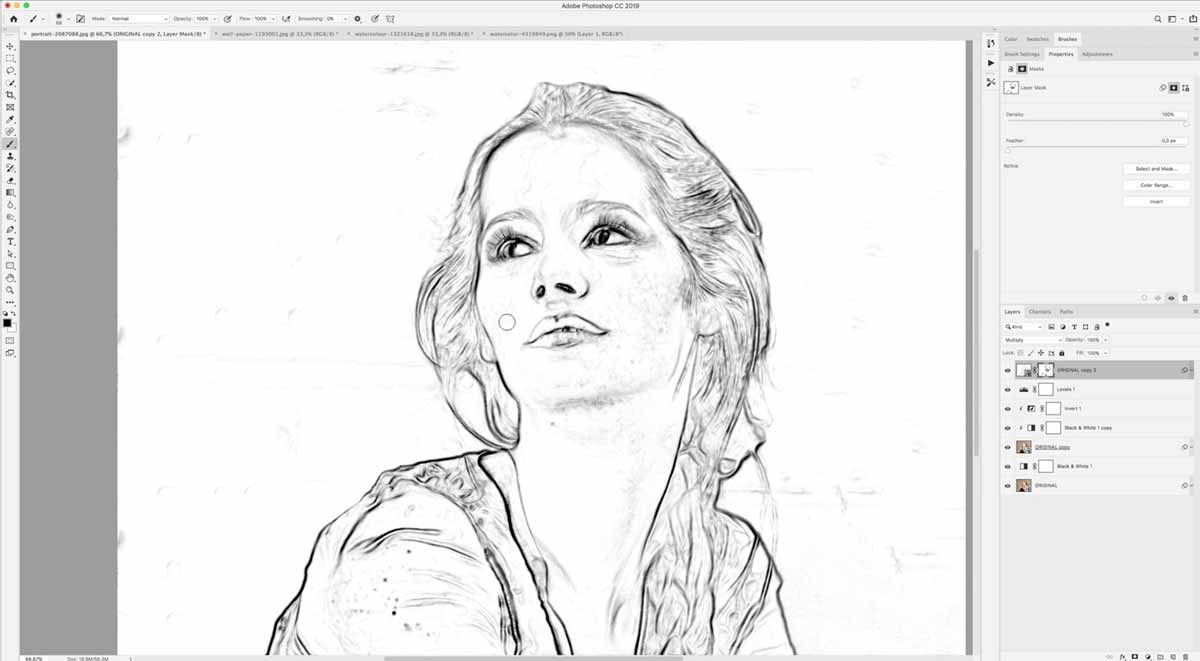
To convert the image into a line drawing click the icon with a black and white circle at the bottom the of layers window, from there create a Black and White Adjustment Layer.

Converting Picture to Drawing
From the layers panel select the two layers and right-click on any of them and Duplicate Layers or Ctrl / Cmd + J.
In the Black and White copy layer, with the right-click on the name of the layer and select Create Clipping Mask with ORIGINAL copy; all the adjustment layers in the Properties window have options at the bottom, the first is this, create the Clipping Mask. You can also Create Clipping Mask with Alt + Clicking on the dividing line between layers; you will see that as you approach the dividing lines between layers and hold down the Alt key the pointer becomes the symbol for creating or undoing the Create Clipping Mask.
Add on top of the Black and White copy a layer of Invert Adjustment and Create Clipping Mask.
Blend the ORIGINAL copy layer in Linear Dodge (Add) mode. A type of silence is created, it is like a sound wave which cancels out the sound wave it’s coupled with; something similar is what is happening in our composition.
Now move a few pixels using filters applied to ORIGINAL copy and the drawing will appear as magic. Go to Filter> Other> Maximum (Radius: 3.7 pixels and Preserve: Roundness) and Filter> Blur> Gaussian Blur (Radius: 2.7 pixels).
Continue to apply filters to ORIGINAL Filter> Stylize> Oil paint (Stylization: 10, Cleanliness: 10, Scale: 0.1, Bristle Detail: 0, check Lighting, Angle: 0, Shine: 0). Edit the filter’s blending mode, double-clicking on the two sliders icon located to the right of the filter layer, and blend them using Darker Colour mode.

Filters of the Filter Gallery
Apply Filter> Filter Gallery> Brush Strokes> Accented Edges (Edge Width: 3, Edge Brightness: 25, Smoothness: 2).
Without leaving the Filter Gallery window, create a new filter layer from the new option at the bottom right of the Filter Gallery window, the filter is duplicated and select the one above to apply Artistic> Paint Daubs (Brush size: 0, Sharpness: 4, Brush Type: Wide Sharp).
Create a new one and apply Artistic> Rough Pastel (Stroke Length: 0, Stroke Detail: 1, Texture: Canvas, Scaling: 100%, Relief: 6, Light: Bottom).
Edit the Filter Gallery blending options by double-clicking on the icon of its layer sliders and lowering the opacity to 62%.
Select the first layer starting at the top and create a new Levels Adjustment Layer to create contrast, drag the black slider to the start of the mountain or histogram, its technical name, and move the white slider to the left to burn the greys more clear.
Duplicate ORIGINAL copy and place it above all the layers and add the filters of: Filter> Stylize> Oil Paint (Stylization: 8.3, Cleanliness: 8.5, Scale: 0.1, Bristle Detail: 0, check Lighting, Angle: 0 , Shine: 0) and apply Filter> Filter Gallery> Stylize> Glowing Edges (Edge Width: 2, Edge Brightness: 6, Smoothness: 5).
Go to the Image> Adjustments> Black & White menu and regulate the colours towards the white area to get a more defined line and apply another adjustment from Image> Adjustments> Invert.
Apply another adjustment from Image> Adjustments> Levels to contrast by dragging the black slider at the beginning of the histogram and the white take it to the left to burn light grey, also adjust the grey slider of the mid-tones.
Applying the Pencil Effect
Finally to create the pencil effect go to Filter> Filter Gallery with the following filters in order:
1 – Artistic> Rough Pastels (Stroke Length 0, Stroke Details: 1, Texture: Canvas, Scaling: 100%, Relief: 4, Light: Bottom).
2 – Artistic> Paint Daubs (Brush size: 3, Sharpness: 0, Brush Type: Wide sharp).
3 – Brush Strokes> Accented Edges (Edge Width: 3, Edge Brightness: 25, Smoothness: 2).
Blend the layers in Multiply mode, create a mask and turn it off.
Having created all the layers, now regulate the Black and White Adjustment Layers to generate a more defined line, in this case the most predominant colours of the image are red and yellow, therefore they are the ones we adjust.
Adjust the layer that we had hidden ORIGINAL copy 2, in the mask paint some areas with black hiding parts of this line and make it a little rougher.
Select all the layers, create a group and name it LINE.
Bring the image of the paper and place it under the group and blend it using Multiply mode, make a Mask and clean some areas by painting using black.
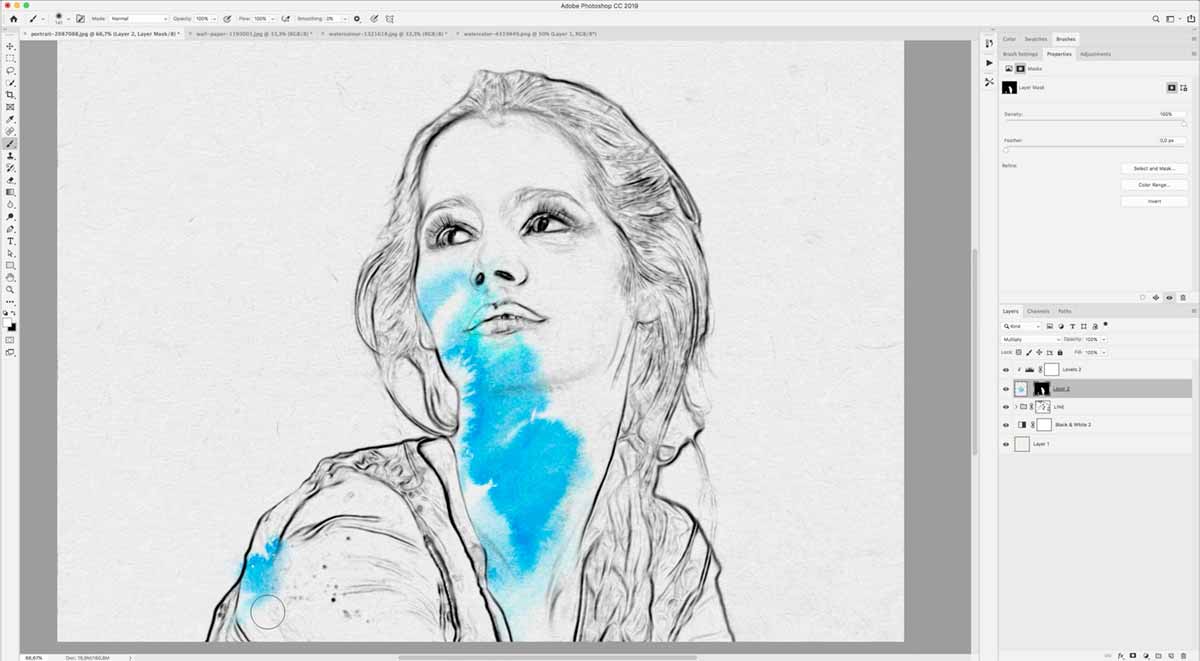
Add Watercolor stain Blue to Drawing
Copy the image of the blue stain, for this drag it to the tab and drop inside the area of the destination image, the image will not be copied if we drop on the tab. You can also select the entire area from the menu Select> All, Edit> Copy and in the document of the line Edit> Paste.
Blend it using Multiply mode and transform it Edit> Free Transform until we find the most creative fit. To eliminate the watercolour’s background colour, making it clear, create a Level Adjustment Layer, select the white pipette and clicking on an area of the background that we want to be white and therefore making it disappear. Multiply mode makes white disappear. In order for the adjustment layer, to only apply to the watercolour layer right-click the adjustment layer name Create Clipping Mask.
Select the layer of the paper and create a Black and White Adjustment Layer to remove the yellowish tint.
In the blue stain layer, create a Mask and fill with black to hide the watercolour, sometimes it is interesting to do the opposite; that is, fill the mask with black, hiding everything and paint with white to discover the stain. You can do this by selecting the mask and from the Properties window mark invert, if it is not active the option is because something is selected, execute Ctrl / Cmd + D and it will be activated.
Paint with white on the mask to discover the watercolour image. You can use the Dodge or Burn tools to lighten or darken parts of the watercolour. Uncheck the chain between layer and mask, activate the layer and with the move tool move the layer to another location that fits better.
Add Watercolor stain Orange to Drawing
Position the LINE group on top of all the layers, normally the line of the drawing always goes on top.
Open the image of the yellow and orange stain and since it is has already a transparent background, Flatten the image by going to Layer> Flatten Image and move it to the composition, place it under the LINE group and transform it using Ctrl / Cmd + T or Edit> Free Transform to find the most creative composition, blend in Multiply mode; then create a Levels Adjustment Layer and Create the Clipping Mask with the watercolour, select the white eyedrop and click on the background area of the watercolour to lighten the background.
Adding color to the watercolor stain in the converted image to drawing
Add a Gradient Map adjustment layer and look for a gradient that applies an attractive colour palette. We can load more groups of gradients from the menu of the gradients window, clicking the Append option. Integrate this layer by blending it using Colour mode and Create the Clipping Mask so that only the colour change is applied to the yellow and orange watercolour.
Create a Mask in the watercolour layer and hide by painting with black or reveal by painting parts of the watercolour with white.

Select all the watercolour layers and their adjustment layers and group them and titling it TEXTURES. Create another group using the background layer as well as it’s Adjustment Layer and titling it BACKGROUND.
Add Ink Splatter to Drawing
Add the splash paint layer moving it to the TEXTURES group and duplicating the yellow watercolour layer, mask it using Create Clipping Mask, we can use the Alt + Click on the dividing line between the layers, by holding down Alt and hover over the dividing lines we will see the mask or unmask icon. Blend using Screen mode; move the mask to the splash layer activates the mask, Select the two layers and move to gain a creative fit.

To colour the line, take a copy of the ORIGINAL copy place it above the LINE group and Create Clipping Mask, blend it using Screen mode and adjust the opacity; with this mode, blacks and greys become coloured, applying colour to the entire line.

Converting Picture to Drawing in Photoshop
Translate the captions to any language. Activate Captions. In the configuration icon, Captions> Automatically Translate and select your language.
Sign up to download the file!